Exceptions
Exception management allows you to formally record and track waivers granted when a security control cannot be implemented in accordance with requirements. An exception is linked to a non-compliant control and follows an approval workflow handled by an administrator.
Exception list
This screen displays the list of exceptions and allows you to filter them by:
-
status (Draft, Submitted, Approved, Rejected, Expired);
-
linked control;
-
expired exceptions only.

Overdue end dates are displayed in red.
Clicking on a row takes you to the exception details screen.
The "New" button is available to users with the Administrator or User role.
View an exception
This screen displays the information for an exception:
-
The exception name;
-
The current status;
-
The linked control (with a link to the corresponding security measure);
-
The exception description;
-
The business justification;
-
Any compensating controls;
-
The validity period (start date and end date);
-
The creator and creation date;
-
The submitter and submission date;
-
The decision (approver, date and comment).
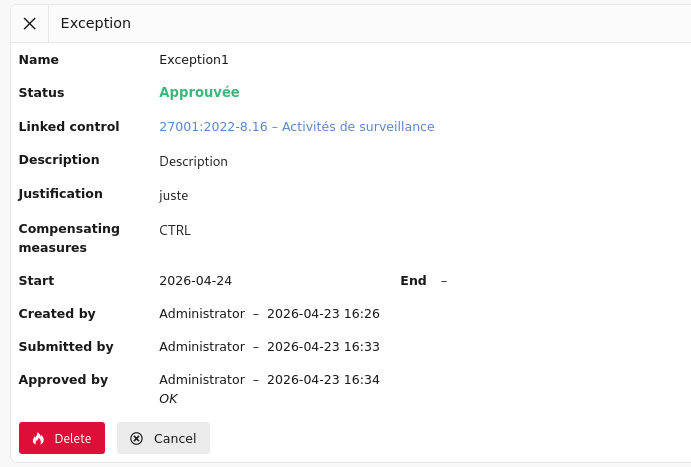
The buttons available depend on the exception status and the user's role:
| Button | Condition |
|---|---|
| "Submit" | Draft status — Administrator or User |
| "Edit" | Draft or Rejected status — Administrator or User |
| "Delete" | Administrator only |
| "Approve" | Submitted status — Administrator only |
| "Reject" | Submitted status — Administrator only |
Clicking on:
-
"Submit" moves the exception to Submitted status and sends it for approval by an administrator;
-
"Edit" takes you to the exception edit screen;
-
"Delete" deletes the exception and takes you back to the exception list;
-
"Approve" accepts the exception and moves it to Approved status;
-
"Reject" rejects the exception (a reason is mandatory) and moves it to Rejected status;
-
"Cancel" takes you back to the exception list.
Create an exception
From the exception list, the "New" button opens the creation form.
This screen contains the following fields:
-
The exception name;
-
The linked control (the non-compliant security measure that is the source of the waiver);
-
The exception description;
-
The business justification (the reason why the control cannot be implemented);
-
Compensating controls (alternative controls put in place to reduce the residual risk);
-
The validity start date and end date.
An exception is created with Draft status. It must be explicitly submitted before it can be reviewed by an administrator.
Clicking on:
-
"Save" records the exception and takes you to the exception details screen;
-
"Cancel" takes you back to the exception list.
Edit an exception
This screen allows you to edit an exception with Draft or Rejected status.
A rejected exception that is edited automatically reverts to Draft status so that it can be corrected and resubmitted.
This screen contains the same fields as the creation screen. The current status and any rejection reason are displayed as read-only for reference.
Clicking on:
-
"Save" records the changes and takes you to the exception details screen;
-
"Cancel" takes you back to the exception details screen.
Approval workflow
The lifecycle of an exception follows these steps:
Draft → Submitted → Approved
                ↘ Rejected → (re-edit) → Draft
Approved → Expired  (automatic, when the end date has passed)
-
Draft: the exception is being written. It can be edited or submitted.
-
Submitted: the exception is awaiting a decision. It can no longer be edited.
-
Approved: the waiver is granted for the defined validity period.
-
Rejected: the waiver is refused. A rejection reason is mandatory and is visible to the requester. The exception can be corrected and resubmitted.
-
Expired: an approved exception whose end date has passed is automatically moved to Expired status.
Traceability
Each transition is timestamped and associated with the user who performed it. This information is retained and visible on the exception details screen, making it possible to justify the waiver during an ISO 27001 audit.